Progress?

It has been a while, with sporadic work being done intermittently enough that once something finally happens, it’s not exciting, just less frustrating.

We got a surprise call from the sales guy today, inquiring about our cover color selection because he still hadn’t ordered the actual cover for our automatic pool cover.

That’s right, we have had a big, water filled hole in the back yard since mid June. We also still have big gaps in the fence. The epitome of safety,  and the pool company hasn’t even ordered the cover.
Since the summer has been cool, the water temperature hasn’t been very pleasant. Something that a cover would also have helped with.
As of today, we have most of the equipment hooked up, apart from the salt water generator, which means we are still chlorinating the pool manually.

But let’s back up and take things in order:


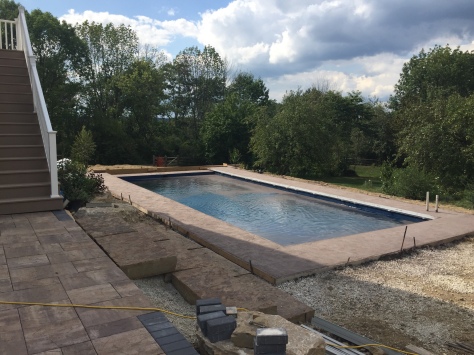
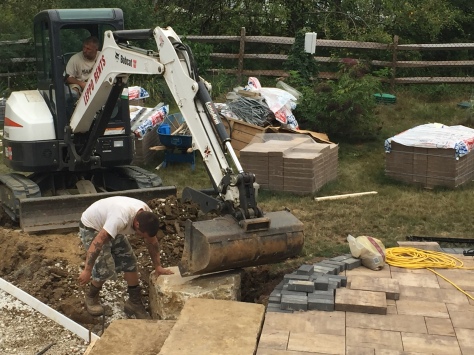
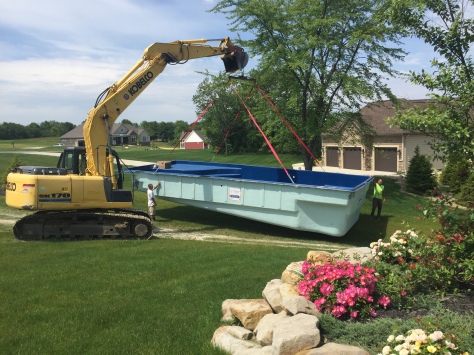
After the flurry of having the pool set, things slowed down. A lot. As in we didn’t see anyone from June 17th until July 18th. However we did get our pavers delivered on July 5th, and got to work laying the upper patio area.

10 pallets of field pavers and one pallet of gray brick for the soldier course. With the upper patio finished we almost 4 full pallets of field pavers left and 2/3 of the brick.
IMG_6603

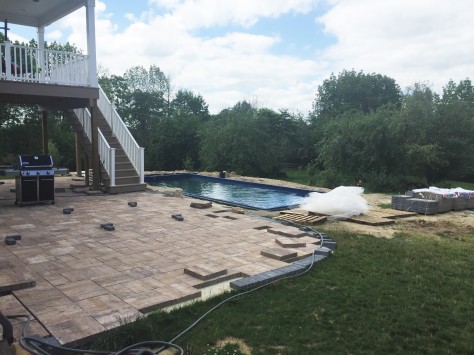
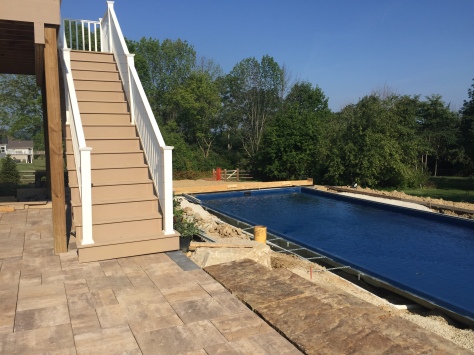
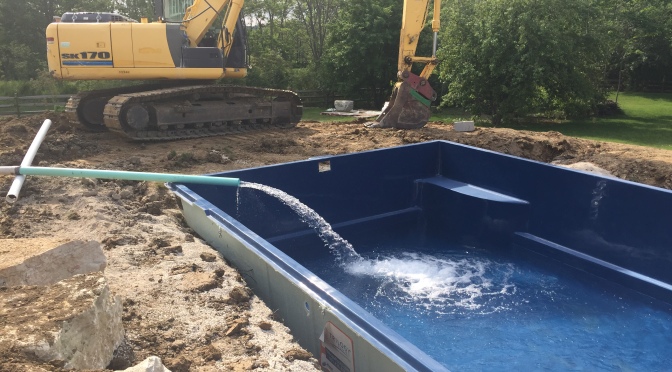
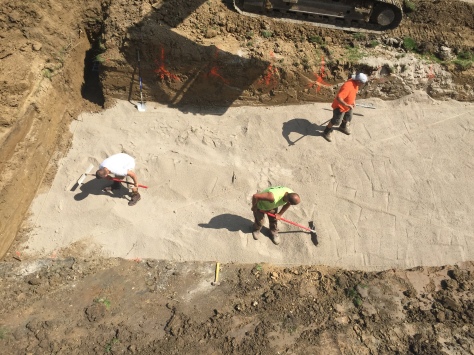
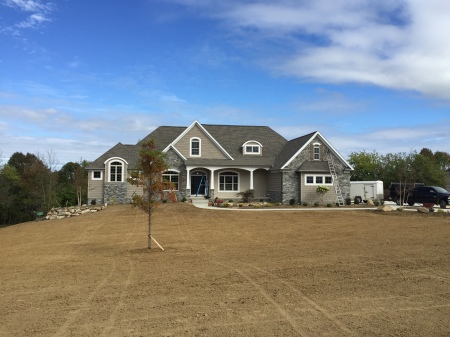
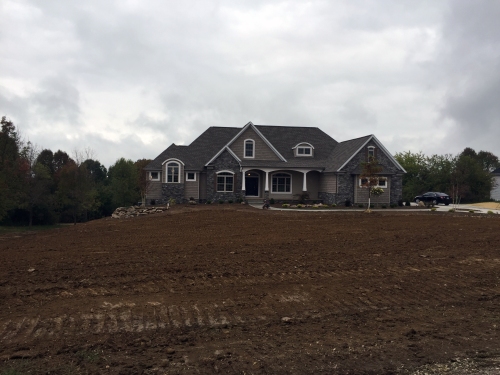
These two picture shows how things were stalled from mid June to mid July. We had the PVC pipes neatly stacked. We had the pool equipment on the pad ready to be hooked up. And then a whole lot of nothing.


OCSU8858

After recruiting a new sub contracting electrician to come install a sub panel and electric box during the second half of June we were hoping to get things rolling again.
At least get the pump hooked up so we could filter the water…

It took until July 18th(!) for anything to happen whatsoever.


IMG_6643
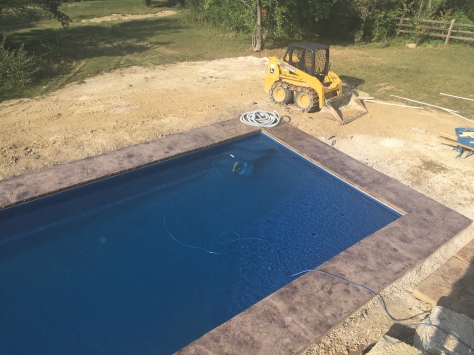
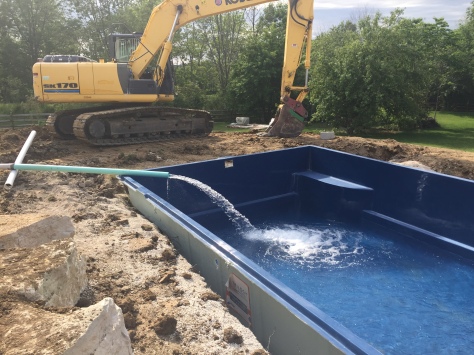
Ta-da! It took less than 2 hours to hook up the pipes to the pool pump. 
IMG_6645
The equipment pad is not the sturdiest thing I’ve ever seen, but look!  Filter closest to the camera, followed by pump and heater. The electrical box is on the wall.

Finally the pool was usable!


On August 1st they were going to build the moulds for the concrete wrap only to realize that one side of the pool was bowing in.
Since the tracks for the autocover needed to be installed on the pool edge, to be incorporated into the pool wrap, this was not awesome.

IMG_6702
The chains, turnbuckles and anchors putting tension on the bowed pool side.
IMG_6698
There is dirt everywhere, but at least the pool is clean!

On August 7th the mould building actually happened

IMG_6715
A plywood box around the autocover hideout, and tracks in place.
IMG_6716
Rebar, copper wire (ground) and plenty of crushed limestone. Note the metal stakes holding the boards in place. Those things hurt.


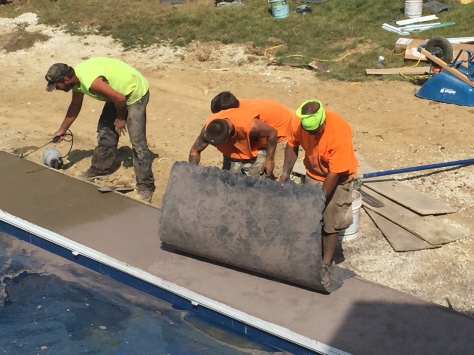
The concrete wrap around the pool was finally poured on August 23, after an interesting obstacle course made up of of bare rebar and concrete moulds surrounded the pool for two and a half weeks prior.

IMG_6744IMG_6745IMG_6747IMG_6759IMG_6761

The concrete was tinted a light tan colour (well, when dry, it looks not so light here), and they used a chestnut release. The release is the purplish powder they put on the concrete before the stamps are pressed on, and will be a darker tone in the cracks and crevices.

IMG_6764

IMG_6775
Bubblegum scented release in the sprayer gets applied to the vertical mould forming the coping of the pool.
IMG_6776
This is how it looked like for a day until they came back and rinsed off the release.
IMG_6777
Other end of the pool. And some dirt and gravel in the water.
IMG_6778
Another angle.

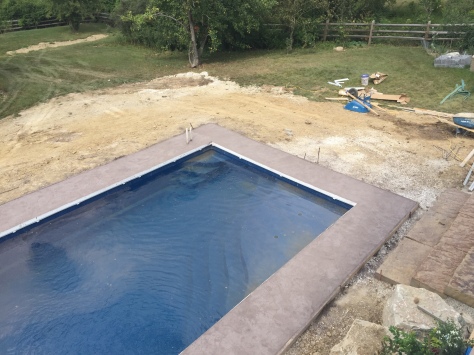
The release was washed off the day after, and the moulds were removed. The day after that the concrete was sealed, bringing out the final colour.

IMG_6784
I can live with this, the rebar is gone 😉


IMG_6785
Dory (pool robot with amusingly erratic algorithm making her seem lost more often than not) doing her thing.


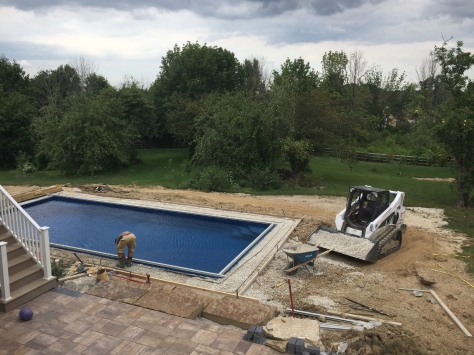
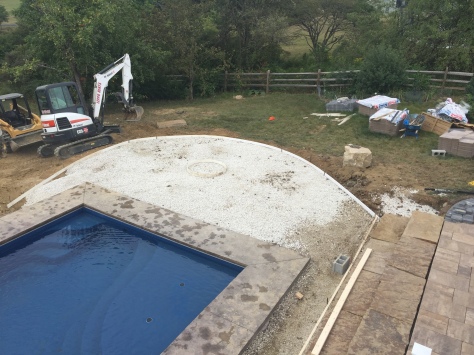
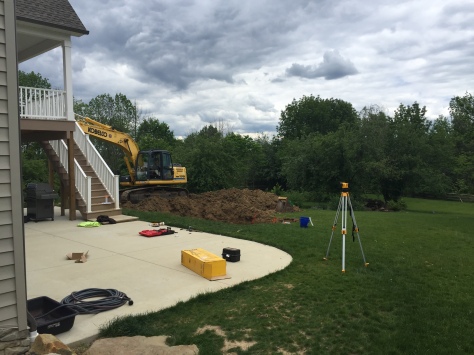
Today , August 29th, lots of things happened. The trench was backfilled, and the area for the lower patio and fire pit was dug out. Concrete moulds were placed and crushed limestone base installed.
Enough to warrant a blog update even!


IMG_6801
Trench backfill.

We also got the stairs rearranged, to make up for the elevation change due to new moulds being used for the pool wrap. We had the option of three steps, with the lower just having a 2 inch step down to the pool deck, or two steps and some innovative solutions for the front of the stairs. I think there will be about an inch of a slightly higher step than the 6-8 inches of the rest of the natural sandstone slabs.


IMG_6791
Crushed limestone going in first.
IMG_6809
Placing the last stair stone. The slabs are not level and square, so getting things to be level enough without toe traps wasn’t easy.
IMG_6811
Digging out for the lower patio. Notice the stairs now are four slabs wide!


IMG_6812
Limestone base and the beginning of the last concrete form.


IMG_6813
Lower patio area, with circular hole for the fire pit. Crackling fires good, exploding concrete bad.
IMG_6821
Placing the big boulder back to the far side of the stairs involved the backhoe and a chain.
IMG_6822
We ended up with two stair slabs extra, since one of the original nine wasn’t deep enough and the replacement wasn’t needed once we decided on the change to the stairs. 4 wide, 2 high, vs 3 wide and 3 high. So we’re trying to fix the approach from the gate to the patio. It’s a work in progress.


Supposedly we will have concrete coming on Saturday, September 2nd, weather willing.
But with how the project has been going  I really wouldn’t bet money on it…


We will Rock you

Today we went to Frank Brother’s in Lodi to pick out rocks for our new fire pit.
The easy way to do this would be to buy a kit and call it good. There are plenty on the market, and some even in the size we’re looking for, but concrete retaining wall blocks look like concrete, and you basically pay a premium for the convenience of having something that looks like concrete.
Hand chiseling stone takes more skill than we possess right now, but stacking stone and using mortar doesn’t.
We will leave a 44″ diameter circular hole in the concrete underlayment for the lower patio. This is so that the fire will not rest on top of the concrete, exploding concrete is bad. The concrete will  however provide a solid foundation for the fire pit walls and the stone of the walls will be lined with firebrick, to protect them from excess heat, and hopefully keep any rocks from exploding. Less explosions is good.
So, we needed pretty rocks!

The idea was to rent a trailer and go get a full pallet of wall stone, in a variety called ‘gray chocolate’. But alas the ball on our truck hitch is too beefy for rental trailers. We decided to go anyway and instead pick out a variety of stones and load the truck bed by hand with as many as we could comfortably and safely fit.

IMG_6556

That turns out to look like this, 1250 lbs of rock.


IMG_6558

Here they are unloaded on the sandstone steps that lead from the driveway down to the back yard.

We won’t know how much more we need until we get started 😉

Wet sand – Backyard mirage

We went over to American Natural Stone for our 3rd visit this week, and ordered the patio pavers and polymeric sand today!
Decision phase over, and now that it’s settled I can drop fretting about whether or not it’s the best option. It will be OK.swhpss_saharachestnutlite_lgChestnut/Sahara Lite it is, a desert themed patio, with an Onyx soldier course. Cambridge Ledgestone XL and we’re getting 3 different sizes: 15 3/4 x 23 5/8
15 3/4 x 15 3/4 and 7 7/8 x 15 3/4, 10 pallets in total to cover approximately 1200 square feet. The Onyx accent pavers will be a regular 4.5×9 sized with the same texture as the bigger pavers. I will run them about 16 inches in from the edges of the patio, with gaps in the dark line where we have stairs leading to and from the patio.

swhpss_onyx_lg

For the main patio areas we’re leaning towards pattern 3, simply because it has the shortest runs of non overlapping joints. I do like the more random feel of number 1 too though.
patterns Or maybe the Random pattern that Cambridge suggests.

random.jpg


That’s it for updates tonight.
The kids have been in the pool 3 times a day for the past three days, summer is great!

Don’t go chasing waterfalls – aka Pool please


A year and a half has passed. We must be missing having building dust everywhere, because after much discussion over the past year we’ve decided that we want a pool.

Our development has a clause that forbids above ground pools, which would have been the easy way out. Both being less permanent and easier to make child and dog safe (and a lot cheaper…). But no, which left us with three options, a vinyl liner, fiberglass or gunite.
Gunite being the classic base behemoth, more labor intensive to install but totally customizable. Fiberglass being more cost for the pool itself,  but a much quicker install. Negatives being that they only come in a set number of shapes and sizes. The fiberglass is coated in an inert gel coat that will not affect water chemistry, unlike gunte.
And a vinyl liner pool, either with metal walls or block/concrete walls. Generally a cheaper construction, less customization than gunite, more than fiberglass.

In the fall of 2016 we had a vinyl pool company come out and give us a quote. It didn’t feel right, and taking into consideration that we have 4 dogs, 3 of whom like water, a liner simply didn’t feel like a good option.
We decided to not go forward with it., however the idea of a pool didn’t go away, despite cold winter months and come March we were talking pools again. In April we contacted about 5 different pool companies, had several come out and in the end settled for one that specialized in fiberglass pools.

An auto cover was something I really felt was a necessity to be able to let the dogs out in the backyard without fearing one of them would launch onto solar film, get entangled and drown. Or what if one of the neighbourhood kids ever feels unhealthily adventurous  enough to brave the fence and enter the well patrolled back yard.

Whenever the pool is not in use we will keep it closed and secured. Less of a death traps.
With 2 acres and an already installed fence we had no restrictions when it came to size and style of pool. We thought we wanted a free form sport pool, with a swim jet system. Turns out if you want an auto cover on a free form pool you will have to install tracks in the decking that look like crap, alternatively do a deck-in-deck solution that also looks like crap.
A rectangular pool can have the track under the coping, less crap to look at, and we found a pool that had the entry point at the right place, with a safety ledge along the perimeter for our not-so-strong swimmer, and plenty of seating for people who not necessarily want to swim. but hang out and cool off.
Trilogy’s Gravity.

p


We geeked out delving into the well of information that can be found over at the Troublefree pool forum. Lots of real people sharing their knowledge about everything from pool chemistry to pump size and flow rates to filters, salt water generators and automation.

We will have mainly Pentair equipment, a variable speed pump, salt water generator, gas heater, cartridge filter and an automation system for controlling it all remotely. There will be two lighted bubblers on the tanning ledge (aka toddler area, baby cousin splash zone), one skimmer and 3 or 4 returns.

Enough words, photos already.

This is a rough draft of the deck, patio and pool area. There will be a 16 foot diameter fire pit area to the east of the pool, and big sandstone boulders acting as low retaining wall between the deck stairs and the pool wrap.

pool final


IMG_6357
Before. With plant pots marking the corners of the pool, and the garden hose showing where the pool wrap and lower patio will be. This is the north side of the house.


Dig Day, June 8th
IMG_6413

IMG_6418
This is how it looked when I came home after class that Thursday.
IMG_6422
Limestone aggregate, will be spread and leveled in the bottom of the hole, making a well compacted and even base for the pool to sit on.
IMG_6433
The dump trucks tailgated the gravel and aggregate up by the road, and the pool crew used their little zippy bobcat to move the pile back to the hole. The orange lines on the wall of the pit marks 4 foot intervals where they check the depth of the hole with the laser level that could be seen in the first dig photo. Once the depth was correct they crossed over the marks on the wall.


The pool arrived in the afternoon!

IMG_6428

IMG_6447
This was the evening on Dig day, the pool was parked in the front yard overnight.


Day 2 was pool placement day.

IMG_6458
Panorama of the finished hole.
IMG_6460
Crushed limestone aggregate being spread and leveled.
IMG_6468
Time to pick up the pool and move it from the front yard.
IMG_6477
This part was truly nerve wrecking, but it worked!
IMG_6487
Setting the pool
IMG_6492
There were some serious measuring going on before they were happy with how the pool was squared up with the existing patio slab. Here the crew is unhooking the lifting straps.
IMG_6507
The pool was jacked up under the otherwise unsupported ledge and some cinder block was also put in place for support. One of the workers crawled into the den like area and started packing in crushed limestone under the ledge and bottom stairs.
IMG_6502
Digging the trench between the equipment pad and the pool. The equipment will live outside the fence, so another section of the split rail was removed.
IMG_6511
While waiting for the late water truck, they started lifting the big sandstone blocks in place. Impressive dexterity with huge backhoe flipping and turning the blocks. The big gap in the fence can be seen here, right next to the fence gate, which was too small to be used.
IMG_6516
The water truck arrived… and was shot on hose. Fortunately the dig crew had spare pipe to cover the 30 or so feet needed. The retaining wall rocks can also be seen here on the left side of the photo. The crew back filled outside the pool with limestone gravel keeping the fill consistent with the rising  water level inside the pool


Over the weekend we did the inaugural premiere splashings, and the boys were playing in the half filled pool the evening before Day 3. The water was a pleasant temperature by then, it was really cold coming out of the tank truck.

Day 3, backfill and more water.

IMG_6532
A second load of water and more backfill. Here you can see the skimmer  held by Mike. Yes, we have another Mike to add to the list. This one is a virtuoso with bob cats and back hoe =)
IMG_6535
The water return nozzles and pool LEDs got mounted and pipes attached, gray conduit for electric and white PVC for water returns from the pump.
IMG_6539
Exciting moment when the water level reached the ledge.  The tank truck emptied a couple of minutes after this, so we still need a couple of more inches of water in there, but it should be doable with the garden hose.

And now we wait. The equipment, as in pump, heater, filter and salt water generator should be delivered next Friday. 8 more days with gaps in the fence is doable if not awesome.
The Electrician is scheduled for Monday the 26th, and we will hopefully have the plumber in around then as well.

After that they prep to pour concrete. We will have a 3 foot wrap around the pool itself, and it will be stamped. A second concrete pour will happen after that, sunk down 2 and 3/8 inches from the pool wrap making a concrete base for the pavers that will cover the lower patio. We will finish the upper patio at the same time as the lower one. We have found pavers we really like, it’s just a matter of picking the right colour(S) and blends.
4b75a255400a3c2bcdfb7b23f43a8ae7

Lampus Grandview in Allegheny (or slate) is Eric’s favourite. I think they’re both too dark for a deck on the north side of the house, partly under a deck. And dark pavers tend to get hotter as well.
I am leaning towards Cambridge Armortec, Sherwood Collection Ledgestone XL, very similar paver to the Grandview, but with more colour blend options.
Maybe Sahara/Chestnut Lite, the border would have to be darker, more like the stone wrap on the house.
traditional-pool

Or perhaps Sandstone with a Riverbed blend border.traditional-patio

Cambridge has a  lighter version of the Allegheny, it’s called Toffe/Onyx Lite, but some pictures of it look a lot more saturated than this, so I am not sold on it.

modern

That’s it for now!


The green, green grass of home

The kids started their new schools today, because it is the start of a new grading period. Meaning for the next couple of weeks we leave our current house at 6.20, drive to, through and past the city to get the high schooler to her school on time.
Then we have an hour and a half to find breakfast before the elementary school opens its doors for the other kids.
In the afternoon the roles are reversed, high schooler gets out an hour earlier than the younger ones.
This means house visits!

We’ve spied on the school bus, lounged on the hearth in front of the fireplace, and had breakfast at the kitchen island.

Here are some staged photos from the Parade of Homes.

bdc757b3-a249-47c7-a58c-02bb3e931f94

kitchen2

ec245139-48d9-4231-af8b-595aec04840f

3f60a917-a4ba-4f95-9597-2d4f8b273043

IMG_2948

This light will swap places with the one above the kitchen table.
Our dining table will live in the kitchen, and this area will be a reading nook.

10ccd6d6-82a9-4dd2-b515-58ea1837372b

bathroom

Edited to Add: The Parade is over and the staged furniture and accessories were moved out on the 22nd of October.
All ready for touch ups that Friday, Cable guys on Saturday, Cleaning crew on Monday and our stuff on Tuesday!


shades hill october 17 2015

Front lawn is coming in nicely!
Much less work than the poor neighbours who seeded their lawns during summer.
Front yard October 17 2015

Our oak tree is changing color.
We also have our first weeds in the garden beds.

O Tannenbaum

This morning was for pointing out where I wanted our complimentary pine trees planted. We figured we would use them as a screen to the neighbour’s basketball court by the dog door corner. That way we would also get more privacy for the rear patio by closing up the only gap in the greenery around the back yard.

The six we were expecting had turned into ten, as by magic.

IMG_2900

This is one way to make ten (eleven, since they also planted the oak tree) holes appear without the breaking of backs and gnashing of teeth.
Very cool drill.
I took these photos through the window while standing on the toilet in the master bathroom.

IMG_2909

Placing the trees in their holes. Four pines get to live where I had planned that the Oak tree should go.
The oak had been planted offset from the front door and office window just before I arrived. It looked nice so this was way to still get something along that west side of the front yard.

IMG_2911

Rinse and repeat in the spot where we were originally hoping to plant pines.

There is one more hole further left, so six in total back here.

IMG_2917

Tilling after the trees were put in place, to loosen the dirt form all the heavy trucks that have passed through to the back during construction.

IMG_2922

These photos were taken through one of the master bedroom windows.

IMG_2919

Heigh-Ho, Heigh-Ho, heading to the front yard for a break.

IMG_2926

The rock hound came next, raking the top layer finer and picking up everything bigger than a fist.

IMG_2928

Then more oldschool manpower. Lots of raking to smoothen everything out even more before the grass seed was spread.

IMG_2930

The birch tree by the garage looks stressed, I hope it makes it.

The front was seeded and done by the time I left. They had a truck with straw and a blower up on the road just waiting for its turn. I believe they were also going to put mulch down before calling it all done.


I watched most of the planting from inside the house. Not nearly as cold and windy in there.

The cabinet maker had delivered the laundry room cabinetry and the office bookcase.
Drew, our trim carpenter, was at work finishing off the fiddly bits to make it fit in just so.
IMG_2884

The bookcase looks nice, but at less than half the size of the one we have in our current office, it feels small.
It is scooted in a little awkwardly, showing a gap at the top, not sure who thought that would be a great idea.

I suppose we will put the current favourite books in this bookcase, and the rest in a secondary wall of books in the basement.

We’ve got board game storage though!

IMG_2903

Different view of the great room with staged furniture.

A light fabric couch is NOT in our future, we will stick with leather thankyouverymuch. >.<


IMG_2929

I watched as the induction cooktop was put into place by Mike-the-Builder and one more man. It was a tight fit, but it slid down to sit flush in its spot.

Also another close up of the handmade backsplash, without mint green and without drywall craters.


IMG_2897 IMG_2896

Master bathroom mirrors were going to get hung today. I guess these are the last ‘before’ photos.IMG_2924

Rubber duckie ledge in the master shower.


IMG_2902

Not our bed, but the shield on the wall is way cool.

It and the bar stools can stay =D


IMG_2935

The exterior painters were busy painting the white trim, and the shutters have their final colour now.
Next time, the house will be surrounded by a field of straw!

I like dirt

front grading done

Dreary last day of September, but I think it’s overcast on purpose. Look how nice the new dirt looks in the front yard against all the gray.

The last of the expected dirt has indeed arrived and been spread and final grading had just finished when I took this photo. The bulldozer was being loaded on a trailer after a job well done.


We walked into the house and saw Designer-Katie and MHC-Kate at work decorating for the open house.
Not really my style, but it doesn’t have to be.

great room

I was told to go check out the basement, so I did.

dog bath

Dog bath has been tiled in dirt colored tile!
It’s 30 by 40 with the bottom at 20″. I will paint the back wall with something that is easy to wipe off and put the grooming table to the right of the dog tub.
Add some type of cheapo plastic shower curtain/bio hazmat solution to contain the hair when blow drying.

We’ll see.

dog bath 2

Closeup. The sprayer is ordered and will make an appearance very soon.

M shower
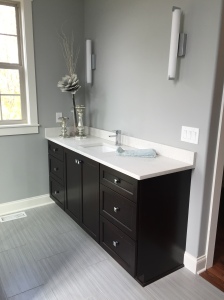
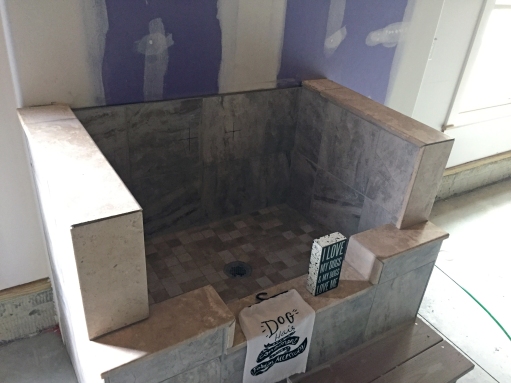
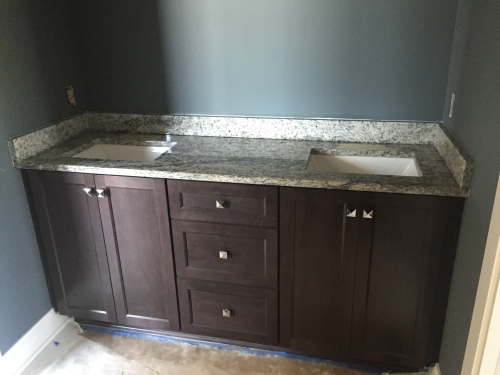
Speaking of baths, Ms shower has doors.


Heading upstairs.
Stair runner and the cool undermounted LED lights have been installed. The Runner is covered in heavy duty plastic wrap to protect it.

stair from basement


stair light strip stair rail light stairs


The fridge and freezer have moved into their permanent positions in the kitchen.

kitchen

The backsplash has been grouted, except for the 5-and-change mint green placeholder tiles above the blue water bottle.

A handful of the darker colour tiles have been ordered and will be installed and grouted and no more mint will enter this house ever again.

kitchen2

Still got the wrong light fixture over the dining area but other than that it looks pretty good.
I like the bar stools!
Dishwasher in the lower right corner.


Ending with some new photos of the master bath with sparkly new glass surround and door.master bath 2 master bath

master bath3 master shower doors

The final countdown

Timeline: Parade of homes deadline minus one week.
The craftsmen at the house today said they will finish in time as long as the builder stays away 😉
Mike-the-Builder has a really good report with them, and they have gone above and beyond when things have cropped up.
Such as instead of grouting the kitchen yesterday like planned they were cutting and installing more backsplash today.

IMG_2762

Happy green =)
Also a first peek at the pendant lights over the kitchen island.

IMG_2765

That BIG box is the dining table chandelier.

Kitchen cardboard

These even bigger boxes are the fridge and freezer, their trim kit is the long box on the floor. The dishwasher has the cooktop on top.
The right light in the wrong spot can also be seen here.

IMG_2740

The laundry room boxes.

IMG_2766

Speaking of lights, here is my favourite entry light turned on.
IMG_2783

Sparkly and throwing cool shadows on the ceiling and walls.

And once again, I am so happy with how this turned out. I don’t think I will stencil these walls after all, the shadows are really neat.


IMG_2763

The great room fireplace has been finished.

IMG_2770

The master bedroom tray ceiling light in action.


IMG_2769

Master bath has shiny new shower heads and controller thingies. Just missing the hand held.

The tub filler is still in its box, now in front of the tub.


stairs base board

Stained baseboard in place on the stair landing.

It looks so much better, or maybe I should say less ‘huh?’ than the white that was there previously.


IMG_2774

Doug-The-Painter didn’t just stain the baseboard and continue the finish paint of the house. He also atomize sprayed the front mesh for our surround speakers, no more stark white rectangles on medium gray wall.
They look darker than the wall due to the black speaker behind, I can fix that and I think it looks much better already.


The checklist is now down to a few items.
One lighting fixture is in the wrong spot, and the one that should go where it hangs is still in its box.
The appliances are in cardboard boxes in their respective rooms, but we are waiting on the ovens.
The tub filler is still in its box in the master bathroom.
Mirrors, towel bars and tp holders are yet to be hung and shower doors installed.
Lastly, the built in bookshelf is being finished off site (funny!) but other than that, it looks pretty close to done!

*cartwheels*


Things look great outdoors as well.

IMG_2795

front yard 2 front yard       IMG_2779

Waiting on even more dirt to shallow out the front and west side swale, so that part has not been seeded yet.

Everywhere else the landscaping is in and ready for mulch and rocks. The backyard and east side future lawn areas are covered in a layer of straw, to help the grass seed germinate.

We also had a fence company out to measure and give us a quote for a 3 rail split rail fence.

Something has changed within me

Something is not the same.

The electricians and the painters were working at the house today putting in their finishing touches.
Appliances have been delivered, there are big cardboard boxes in both the kitchen and the laundry room just waiting to be installed. Fridge and freezer are evident, as is the dishwasher, not sure if the ovens have arrived yet. In the laundry room boxes we have washer, dryer, 2 pedestals and we think the 5th box in there might be the laundry sink.

Speaking of kitchen. I was thrilled to see this today:backsplash

Yes, I especially like the damaged drywall areas!

Why? Because yesterday it looked like this:IMG_2719
And I hated it. Those light mint green tiles made the whole backsplash look pixelated and the stark contrasts did not work for me at all. Especially not with the countertops, and those are not going anywhere.

If the light ones had been in a shade in between the dark and the middle colour, with more of a brown tone it would have been much closer to what I had envisioned.

Luckily, our head tile guy was installing the rubberized membrane on the dog tub in the basement. We happened upon him as we were checking out the basement while I was still whining about the kitchen.
We told him how we L-O-V-E how the shower turned out, but that the kitchen backsplash was atrocious (clearly no fault of his, that selection is all on me), and how I had read up on glass paint in different forums and been to craft stores earlier in the day to figure out how to paint the backsplash until we can have it replaced.
He said that since it wasn’t grouted yet, he could ‘just have his apprentice pop some of the light ones out’.
Serious doubletake.
Really!?!
He double checked to make sure he had enough of the other two colours to be able to pull it off, and he was only 1 bullnose tile short.

YES! =D
backsplash2
So instead of having a grouted backsplash today, we have this, and I couldn’t be happier about it!


Front

More changes, we have hardscaping!
The foundation plants are also in. There are 6 trees left to be planted in the front yard, you can glimpse them to the right of the trucks in the photo. Also 6 more trees for the west side, but we are waiting on more dirt before they finish off the front yard and put down grass seed.

Landscaping happened yesterday, and we had them take out one of the apple trees in the back yard that was a little mutilated during septic tank install.
I liked that tree, but it will be easier to get the fence in now.

The new stairs leading down the the backyard, they flipped those huge stone slabs around with a backhoe and scooted them into place after digging out their spots with hand shovels.

stairs2

stairsbackyard

And here is the backyard, the disturbed areas here have been seeded. The septic mound in the very back has new grass peeking through the straw!

We will kill off the ground covers in the treed areas and either seed it or plant something that is less likely to be poison ivy.


Heading indoors again:

IMG_2712

Lockers, with hangers.


IMG_2713

The kids’ fans were all lit up.


So were the can lights.
And…

stairs and the light

Do you see it?
the light

It is THE light. The one I gave up my DIY itch for.
It is right where it should be and I think it looks awesome.


Another happy room.

powder room

Powder room, with electricity.

I think I might not have to stencil these walls after all, those are some really cool shadows cast by the chandelier.

The mirror is the only thing missing in here.


stair landing light

The painters had stained a couple of lengths of baseboard, to replace these white ones on the stair landing. It just looked odd with stained baseboards flanking the actual stairs, then switch to white at the landing and continue with stained for the other half of the stairs.

Also, there is a safety light here for night time stair-strolls.

The LED hand rail lights are yet to be installed.


IMG_2705

Rocker switches in the office.

IMG_2707

Power and ethernet ports. The desktop powerhouses will be hardwired for speed.

Our cabinet maker is building the built in bookcases off site, but besides that small thing, the office is finished.


The great room looks like this.

IMG_2718

Those surround sound speakers make me sad.
We have this beautifully finished, perfectly smooth expanse of wall, and then there are those -things-.
The painter will try to dilute the wall paint down and atomize spray them, but the holes in the mesh are so fine it might not work that well.
What on earth was he (as in the husband) thinking?

Oh well, maybe I should take up tapestry making and cover that whole wall.

On a happier note: fireplace stone is pretty much the only thing left in here.
And blinds.


IMG_2755

IMG_2725

The rack with the home automation system,  waiting for more tech toys to move in.

master bedroom2

Master bedroom with electrical outlets and TV installed.

The electricians and painters were doing their final work, and the rope light in the tray ceiling was going in as we watched.

This room is done!


IMG_2722

The ball over the tub all lit up.
The tub filler and the shower faucets are still in boxes in here.

IMG_2724

The sconces that will flank the mirrors over the vanities all work.


IMG_2723

Master closet #2 gets to close this post.

Workday visit

With a house showing, a truck full of dogs, and time to kill I went over to the house just after noon today.
Pulling up I noticed a lot of vehicles. A Chippewa Stone truck, a HVAC truck, a plumber truck and 7 other miscellaneous pickup trucks, cars.

And a dozer.

Inside there was a lot going on.
The trim carpenter and his crew were doing finish work, partly following the path left by the hardwood floor installers.
The lockers now look like this:
lockers

The lower section actually slides out, (or did before the front edge of trim was attached) so the flooring underneath is laid in full sections, like the rest of the floor.
!!! NB: Shoe space !!!


Looking UP.

garage foyer light

That is the garage entry foyer light.
Meaning one of the teams in the house were installing light fixtures.

The light looks a little on the small side, or maybe the ceiling is just big.


Also:

kitchen counters

Kitchen counters!
They are beautiful.
The installers were rolling on sealer and stepped out of the picture just as I took it. The granite is still wet in this photo.

IMG_2568

Eric’s sink.

IMG_2572

All the pieces fit, it is almost like they do this for a living.

This is the counter area closest to the pantry door.


Next stop: office.

office wainscoting and floor

The header for the paneling is in place, as is the shoe molding.

office fan

Bubble glass  office ceiling fan!
I wonder if the other side of the blades are darker. I think that might look better.


master showerShower!

master bath

Bathroom sconces and bathroom countertops. Sink mounting in progress.
Now I don’t have to wonder how they did it.
Worker count in here: 1.


master fan

Master bedroom ceiling fan.

master wall

Master bedroom wall colour in the corner meets floor. Got shoe moulding here too.

Electric outlets and switches, and the lighting in the tray ceiling are the only thing missing in this room now!


stair handrail

Stairs were also being worked on while I was there.
Notice the moulding at the bottom of the pillar.  I think that looks nicer than the crown on top.

stairs

Worker count in this area: 2 (3?).

floor dining corner

This is the same corner I took a photograph of yesterday. With more floor and trim.
The floor is gorgeous in daylight!

I think the reveal of the last of the Big Unknowns that were decided before we even signed the contract to buy the house turned out to be a nice one. It has character.


powder room chandy

Peeking into the dark powder room, there was sparkle!

The hole in the ceiling behind it is for a fan. The light might sparkle, but like every room in this house, it is actually meant to be used.
Do not like superfluous spaces. (Remembering the house hunt this spring with the countless formal living and formal dining room of so many colonials.)

powder room
This is where one of the plumbers were working.


boys bathroom vanity with counter

The boys’ bathroom vanity counter is in place and so are their two sinks. The granite is very pretty.

I am not a big fan of Jack&Jill bathrooms in general (this is a T&C bathroom). But the boys do brush their teeth at the same time, and I have witnessed enough space squabbling with accompanying toothpaste leakage to think this might work very well for them.

Two people were installing wood floors in Ts bedroom, to the left, and another was assembling a ceiling fan in C’s bedroom to the right.


IMG_2569

M’s countertop and sink. Hers will likely be messier than the boys’. On the other hand, the toilet will be a lot cleaner.

There were a few people in the unfinished part of the basement too.

One was moving the window screens from the area under the stairs where they have been stowed.

Another was doing something with red and blue pipe.

hot water heater 
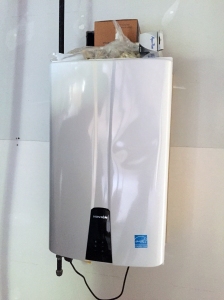
Also, we now have a water heater!


Total worker count, no idea, they kept moving around, but maybe around 13. Plus Mike-the-Builder who was showing a couple around, discussing their future house.
Point is, it wasn’t crowded.


slope from driveway

Closing with the view from the concrete pad outside the garage, looking north. I want a split rail fence going from the side of the house here curving right and away into the trees and straight back to the far side of the septic mound. I estimate it will be 6-700 feet. *gulp

This is where the landscapers will install sandstone steps leading down to the backyard and patio.

Next week!

——————————————————–

Edited to add:

west side

This photo was taken on September 18th (the day after the others), just to show where we are at, dirt wise.

More dirt is scheduled to arrive early next week, so lawn installation has been pushed to Wednesday.